Posts

Showing posts with the label crafting series

Pacifier Holder

Image
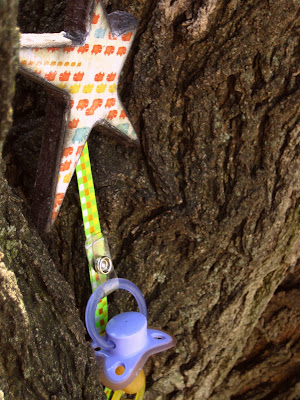
Who needs a hair-bow holder? What I need is a pacifier holder. Admit it, you've spent time under your babies crib, haven't you. Well, search no further, I have your solution. The Pacifier Holder.  Super easy to make,  super easy to use,  and  SUPER convenient.  Life just got easier ladies. Need I say more? (and because I'm a mom... I just have to share)
Image
 Baby gates and blankets, two of the most common items any young mother has in her house. Also two of the most worn out items in that same house. Before you decide to toss out that broken old baby-gate and soiled, torn up blanket why don't you consider upcycling them into the easiest pup-tent in existence. The Baby-Gate Tent. This project only required 4 screws and can be created using the most basic sewing (straight lines anyone?) As for how much the kids will like it? Well, I'll tell you... it took some real finesse on my part to get the tent away long enough to photograph it. Psst-- It's also super easy to move around.

Craft: #9 (Kids Play Sign)

Image
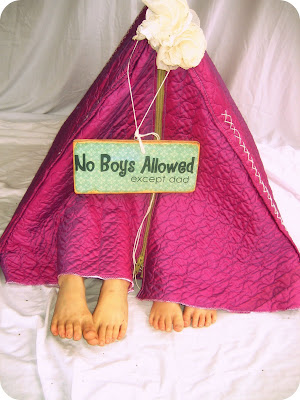
Over Christmas break we drove to Utah to visit Ralexwin's family. When we were there I saw this little rock sitting outside my sister-in-laws front door. On one side it had a smiley face and the other there was a frown. Obviously I had to ask her why on earth she had a frowning rock on her doorstep. She explained to me that it told the neighborhood kids that her kids couldn't play. If the smile was facing up they could. This saved on excessive knocking. I loved the idea! So I made my own... of course. :) This was super easy. It took paper, mod-podge, spray paint, a piece of wood, and some ribbon. The hardest part was drilling the little holes for the ribbon to go through... and that was easy! I have yet to really try it out. Summer will be the true tester of it and I imagine there will be a transitioning stage for all of the neighborhood kids, but hopefully I won't have kids knocking on my door at 8:30 at night anymore! PS I moved it the day after I took this pictu...

Craft #8 (Picture holder for a Child)

Image
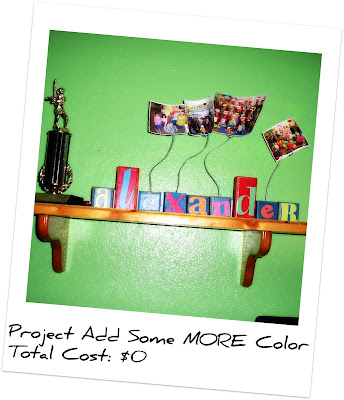
I have a friend who says that it's funny how whenever I want to make something I seem to produce the most random objects out of nowhere--all of which fit exactly what I need. This would be one of those projects. What is needed? -Blocks from your childs toy box. -Scrapbooking letters. The big kind. (I got mine in this big book of paper letters at Wal-Mart... I use them for everything, totally worth buying) -Some thick wire I had lying around... okay, Ralexwin had in his tool box, but still. -Some ribbon, it can be the ugliest ribbon on earth, no one's going to see it. -Oh, and Mod-Podge. ----- 1.Mod-podge the letters to the blocks. Then sand edges if you want to have that rougher look. 2. Take the drill and put some holes into the tops of some of the blocks... use the size just smaller than the size of you wire. 3. Twist the wire around, making sure the end is sort of a flat spiral (like you would draw on paper). The spiral is what will hold the photo, so...
Craft Door Greeting (#7)

Image
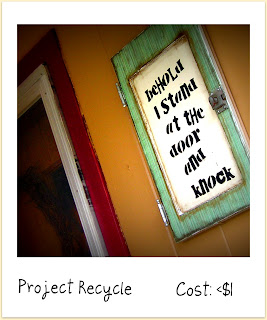
I figured I'd end the month with a week long celebration of crafts (minus Monday), which really just means I have more crafts I've made that I want to brag about. Like this one. About two weeks ago my friend and I heard that the next town over was having a city wide clean up. We got very excited because this was code for free stuff laying out on the curbs. So we took my truck over and loaded up on doors, windows, old chairs and what not. This little creation came out of that. It's a medicine cabinet door that I liked. The problem was, as I thought about it and stared at it I couldn't come up with anything to do with it. Then, as these things tend to happen for me, I was laying in bed one night and it came to me. I started working immediately the next morning and between motherly duties for the next two days I managed to put this little gem together. The hardest part was the stenciling because I literally printed out large words and pen knifed them out of the pa...

Craft #6

Image
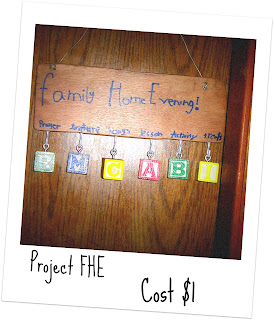
Now that you've seen the quantity of scrap wood I have around my place. It's not surprising that I have little pieces floating around as well. What better way to use them than on little projects. We do a family-home evening every week. This is a day we spend studying scriptures and talking about our beliefs with our children, as well as just being together, having fun and playing. We have a chart to keep track of whose in charge of what. This helps the kids get excited, and helps Ralexwin and I better share the load. The chart has always been made out of paper. Until recently when Vicbowin and I made this one. We took blocks from the toy box (one for each family member's name--or middle name) and drilled hooks into the tops. We did the same thing with the wood base. Vicbowin wrote the words and I did the drilling. It was a fun project to do together and now sits proudly in our living room waiting for each week to come so the kids can move their block to the next ...

Craft #5

Image
 First off, taking a picture of a mirror is not an easy thing. I'm amazed that people succeed in this at all, but I've never claimed to be the best photographer in the world so you'll have to deal with these pictures. This is a half done project. I wan to add a 'frame' around the mirror to make it a floor mirror, but that means going to the lumber yard and, well as you may know... I avoid the lumber yard . So my mirror remains undone. I thought I'd share the 'so far' of it anyway. Background: You might be wondering how this project cost me nothing. Well, it's because this is an 'extra' mirror. I replaced it with a new one in the bathroom and Ralexwin refused to get rid of this one. So for months it sat in our bedroom until I ran across a mirror redo post on another blog. (The mirror was pretty beat up). So here's what I did: First get ready to get dirty... Then follow these steps-- 1) Lay the mirror on it's face and pu...

Crafting Extra #2

Image
I saw this really cute idea online the other day that, of course, came with a price tag. I spent a few minutes toying with the idea of buying it before I realized--'Hey! I sooo can make that.' Ah, freedom.   (it keeps coming out blurry... sorry)   Say goodbye to the repetitive "Mom,what's my phone number?" or "I need you to call Jane's mom so she can come over!" Say hello to the child calling card. I love this idea. It is so convenient, especially now, at the end of the school year. It would be great for when you are moving to a new area as well (to give to friends the kids will be leaving behind). All I need now is some sheets of business cards (or old school you could just print a sheet of them on card stock and cut out). You can have this one and tweak it for you or you can make your own! I used Paint.net (my photo-shopping tool of choice) as well as some extra fonts I found over at fonts for peas (the gum ball machine came from one ...

Craft Numero Quatro (#4)

Image
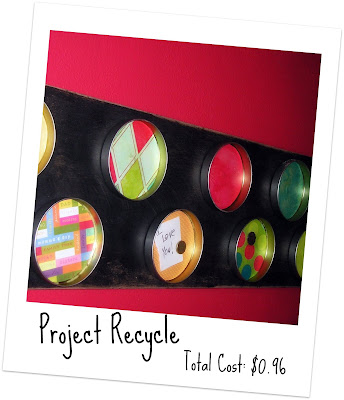
When we moved in to our current location Albowin was a devoted fan of The Hulk. His life revolved around the green man with the anger issues and all he wanted in life was to 'be green.' So when it came time to paint the bedrooms he was adamant about the color. . . even the hue. Then he grew disillusioned with The Hulk and decided he was scary. Down came the poster's and out went the toys. All that remained was the painted walls. I didn't mind the color, but it really needed something else. In comes my favorite past time... the blogging world... and I found the greatest idea . Circles of paper mod podged to ply wood and hung on the wall. So I did it! I actually had to print off the papers (which I'd accumulated on my computer from digifree ) that arguably cost some money in ink, but since I didn't have to buy ink any time soon after, I don't count it. The 'how to': Find the papers that you want. Well, I guess first figure out how big yo...

Extra Saturday Craft!

Image
All the kids are outside playing (excepting Remewin of course) and I thought I'd post an extra craft I came up with this last week. I'm totally excited about this one because it is ALL mine. No links to other cute crafters who made the same thing, nope I made this one up. They say 'Necessity is the mother of all invention' well, this is it for me. After Easter came and went I ended up with these little tins floating around the house (each one the size of a CD) they had originally held a cookie each but within a day all that was left was the tins. I hated the idea of just throwing them away so I started mulling over what I could do with them. This is what I came up with: (really bad picture) The cost was for the spray paint. I put it over my dresser in my bedroom. The best part of it is that it's magnetic! Which makes it great for leaving little notes on. I don't know what to call it, maybe magnetic wall art or circle-magnetic dresser topper :). Firs...

Craft #3

Image
This is a craft my friend and I came up with for a church activity. We were at Michael's and I spotted these papers: Now, I'm sure I've told you before, but I can't re-iterate it enough, I am a paper addict. It doesn't even have to be blank pages in a notebook or journal. Nope. Pretty paper does the same thing for me. So when I see papers like the above, I get all warm and fuzzy inside and I have the strongest urge in the world to grab one of everything and run to the cashier. In an effort to thwart this...desire... I make myself justify each buy. It usually works. In the case of these papers I was, in fact, looking for a project for the above stated activity. My mind ran through the many crafting blogs I read and I came up with a rough idea of what I could do. So I bought the papers. What was created was a smash hit at church. ::polishes fingernails:: So here's how it works. Once again you'll need mod-podge (this is the liquid gold of the cra...

Craft #2

Image
This is one I'm super proud of. I saw an idea in a Better Homes & Gardens magazine where you use a ceiling sconce (the decorative metal that goes around lights) as a wreath. I loved the idea, but I'm in no position to be buying something so frivolous. So I've just lived with the pain. Until a few weeks back when I looked out my front window (as the snow had started to melt) and remembered that I had a half broken bird bath in my yard. I trudged through the mud and snow to take a look. Sure enough the bottom part was all fancy, and better yet, it was screwed on instead of soddered! Triple score! I hauled it into the back yard (kids pressing their faces against the windows trying to figure out what their crazy mom  was up to) and unscrewed it. Then I hauled it down the stairs to my 'work station' i.e. the laundry room. I scraped all the peeling paint off and then took some sand paper to the rust. When I was satisfied I wasn't going to have any ma...

April Theme: Crazy Crafting Cannwin

Image
Okay, I have to admit that all these craft blogs have my creative juices on over-drive. This might be only exacerbated by the fact that I am in charge of overseeing the women's groups at church, plus a supply of plywood in my garage just sitting there looking lonely. Since I've spent so much time filling my house with fun things to use and admire, I thought I'd share a few of them this month. How fun can that be really!? I'll start small for all of you. I'm really good at keeping track of my keys, but I've found that this is a bit of an oddity for me. Not many people have such a talent ::coughralexwincough:: So I made this little gem to go over the coat rack by our back door. It's a conglomeration of several things. 1) some nice lookng hooks I picked up in the hardware section of Wal-Mart. (Wouldn't it be cute with antique drawer knobs?) 2) a 'family rules' list I made on my computer (It was a lot of work, I had to print it out...